How to Weave with Cedar
by Elham Atighi Lorestani
by Elham Atighi Lorestani
Download the designed version for home printing here
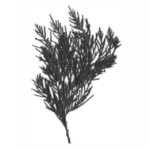
The different varieties of cedar that exist along the west coast of North America are an integral part of Indigenous life in the region. In the Coast Salish territories there are two cedar species: western redcedar and yellow cedar.
Western redcedar (Thuja plicata) is a large conifer that normally grows to become 60 metres tall. With a buttressed base and a rapidly tapering bole, the tree can grow to 8 metres in width. The wood of the Western red cedar is soft, straight, and very light. Its heartwood is pinkish or reddish brown to deep warm brown, and is highly resistant to decay. The wood has a very distinctive aromatic odor. The wood has exceptionally good working qualities, yielding a smooth satiny finish and it splits readily, taking nails and paint well. Western red cedar is a mainstay of Indigenous life and culture on Canada’s West Coast. This tree of life has provided clothing, shelter, transportation and a medium for Indigenous art and craft work.
Yellow cedar (Chamaecypris nootkatensis) is a medium-sized tree that grows up to 24 metres tall and to 90 centimetres in diameter. It has a broad, grooved trunk that spreads out widely at the base. The crown is sharply cone shaped, with branches that spread out and droop into loosely hanging branches. Indigenous peoples along the coast use yellow cedar extensively for paddles, masks, dishes, and bows and weave the bark to make clothing and blankets. The wood is very valuable commercially because of its straight grain, yellow colour, and resistance to decay.
Harvesting cedar bark is generally done during the summer months when the sap is running. Cedar bark can only be live harvested once from a tree. Once the tree has been harvested, for example for the purpose of making a basket, it is deemed to be a culturally modified tree. After harvesting, the outer bark is removed from the inner bark. The inner bark is the material for crafting practices which will be dried after harvesting until it is needed for a project later on.
“What comes from the earth returns to the earth.” – Brenda Crabtree
Soak red cedar strands in water for at least 20 minutes until it becomes pliable. Soak yellow cedar strips for 4 minutes until it becomes pliable. Be careful not to oversoak them.

The foundation for a basket always starts here.
One of the most common ways of beginning a cedar basket is with a twill weave base.
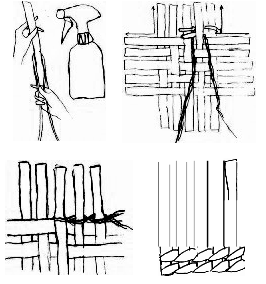
A basketry technique in which two horizontal strands, or one strand folded in half, cross over each other in between the vertical strands
The strand on the right is always down towards the centre of the basket and you only work with the left strand.
For twining, go in front of the middle spoke and then behind the next spoke.
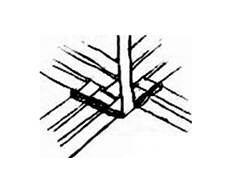
The spokes are the foundation or base of the basket. They also continue vertically up the sides of the basket. After the base of the basket is woven, the spokes are bent upwards to begin working on the sides of the basket.
Go from spoke to spoke and press them forward with your fingers. Bark has a memory, so doing this makes it easier for weaving
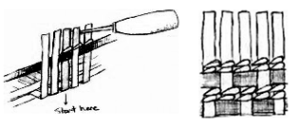
The horizontal weave which crosses over and under the warp strands or spokes.
At this point, all the strands need to be evenly spaced.
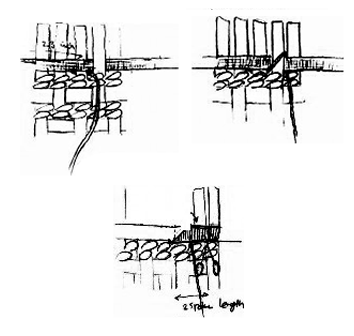
Take an independent spoke (weft or wrap around spoke) and start from the middle with an over and under weave.
At the same time, do two rows of strands twining.
Do as many rows as you want!
To create the finished edge of the basket:
At the end, bring the spoke to the front and continue until the end.
Crabtree, B. (2016) Cedar Basket Weaving with Brenda Crabtree: Urban Access Project, Aboriginal Gathering Place. Emily Carr University Production Service. https://vimeo.com/126622123